


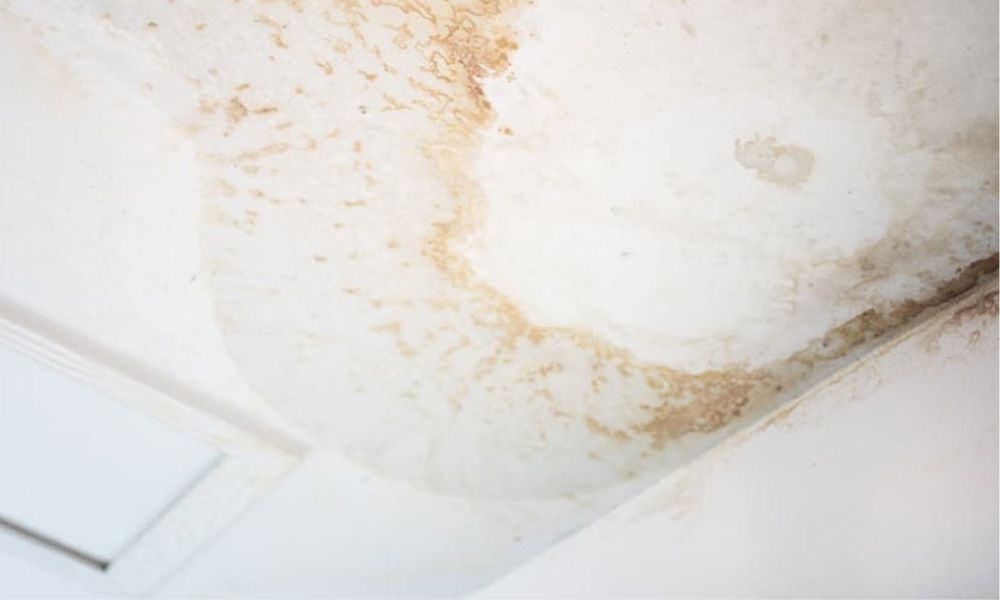
Locating leaks can be challenging, especially when they're hidden behind walls, ceilings, or floors. Thermal imagers can help you pinpoint the problem area without damaging the building structure. This article explains how thermal imagers can help detect leaks and the steps involved in using one.
Can a Thermal Camera Find Water Leaks?
Yes, thermal cameras can locate leaks by detecting temperature changes caused by moisture, without directly observing the water itself. When water leaks inside a wall, ceiling, or floor, the damp area will appear cooler due to moisture evaporation, or warmer if it's hot water, creating a noticeable temperature change.
These temperature changes allow for quick and non-destructive location of the leak, saving you the trouble of tearing down walls or causing unnecessary damage.
What Types of Leaks Can a Thermal Camera Detect?
Thermal cameras can detect several common types of leaks by displaying abnormal temperature patterns caused by moisture or liquid flow. Below are the most common types:
- Pipe Leaks: Thermal cameras can help locate leaks in pipes within walls, ceilings, or floors by detecting temperature changes caused by leaks, without requiring you to open the structure to inspect the leak.
- Roof Leaks:Thermal imaging cameras can also detect roof leaks, highlighting cooler areas where moisture has seeped into the insulation or roofing material, helping to narrow down the leak's location.
- HVAC System Leaks: Thermal imaging cameras can also show abnormal cooling around pipes or air handling units, allowing you to find HVAC system leaks caused by condensation or pipe problems.
- Underfloor Heating Leaks: Thermal cameras can also detect uneven temperature caused by leaks or malfunctions in the heating system, helping you pinpoint the problem area without removing the floor for inspection.
- Automotive Fluid Leaks: Thermal imaging cameras can help you detect localized temperature changes around affected parts of a vehicle, identifying fluid leaks such as coolant or cabin air fluid leaks.

How Accurate Is Thermal Imaging for Leak Detection?
Yes. A thermal camera can help locate water leaks by detecting surface temperature changes caused by moisture, but it cannot see water directly. When water leaks inside walls, ceilings, or floors, the affected area often appears cooler due to evaporation or warmer if hot water is involved, creating a visible thermal contrast on the surface.
This temperature difference allows you to quickly narrow down the suspected leak area without opening walls or damaging the structure. However, thermal imaging works best as a non-invasive locating tool rather than a final confirmation method, and the exact leak point should still be verified using visual inspection or moisture-measuring tools.
How to Find Leaks with a Thermal Camera (Step-by-Step)
Step 1: Create a Temperature Difference
Thermal cameras work best when there's a significant temperature difference. You can test by turning on or off hot or cold water, switching the HVAC system on or off, or when the temperature difference between indoors and outdoors is large, such as in the early morning or late afternoon.
Step 2: Slow Scan and Maintain a Stable Distance
During the test, move the thermal imager slowly, scanning the walls, ceiling, and floor. Maintain a consistent distance and angle, making it easier to spot and compare temperature differences.
Step 3: Look for Abnormal Thermal Patterns
In addition, pay attention to irregular cold areas, mottled shapes, or streaks that don't match the surrounding surfaces. Hot water leaks may show warm-colored lines along the pipe's path.
Step 4: Trace the Thermal Pattern to Locate the Leak Source
Water will also spread outwards from the leak point, so you can use the thermal pattern to locate possible pipe paths, joints, or valves, narrowing down the leak source.
Step 5: Confirm Before Opening Any Components
After completing the inspection, you can also use visual inspection, a hygrometer, or a small inspection port to confirm the leak. Thermal imaging technology can help you locate leaks and reduce unnecessary damage.
Step 6: Rescan after Repair
After leak repair, rescan the area to ensure that the abnormal thermal pattern has disappeared and the surface is dry as expected.
Common Mistakes When Using a Thermal Camera for Leak Detection
Myth 1: Expecting Thermal Imagers to Directly See Water
Thermal imagers cannot directly see water; they can only display temperature differences caused by moisture. The idea that they can "see through" walls is a misconception.
Myth 2: Ignoring Temperature Differences
Leaks are more easily detected when there is a significant temperature difference. Scanning without hot or cold water flow, or without the influence of an HVAC system, can lead to unclear results.
Myth 3: Confusing Airflow or Insulation Problems with Leaks
Cold air, missing insulation, or thermal bridges can appear similar to water vapor on thermal images. These phenomena require careful interpretation.
Myth 4: Scanning Too Fast
Moving the thermal imager too fast can cause it to miss subtle thermal signals. Slow, steady scans yield accurate results.
Myth 5: Ignoring Environmental Factors
Sunlight, wind, and recent weather conditions all affect surface temperature. Ignoring these factors can lead to inaccurate readings.
Myth 6: Not Confirming Results
Thermal imaging helps narrow down the problem area, but it's not recommended to stop there. Before carrying out repairs, a visual inspection or a hygrometer can be used to identify suspected leaks.
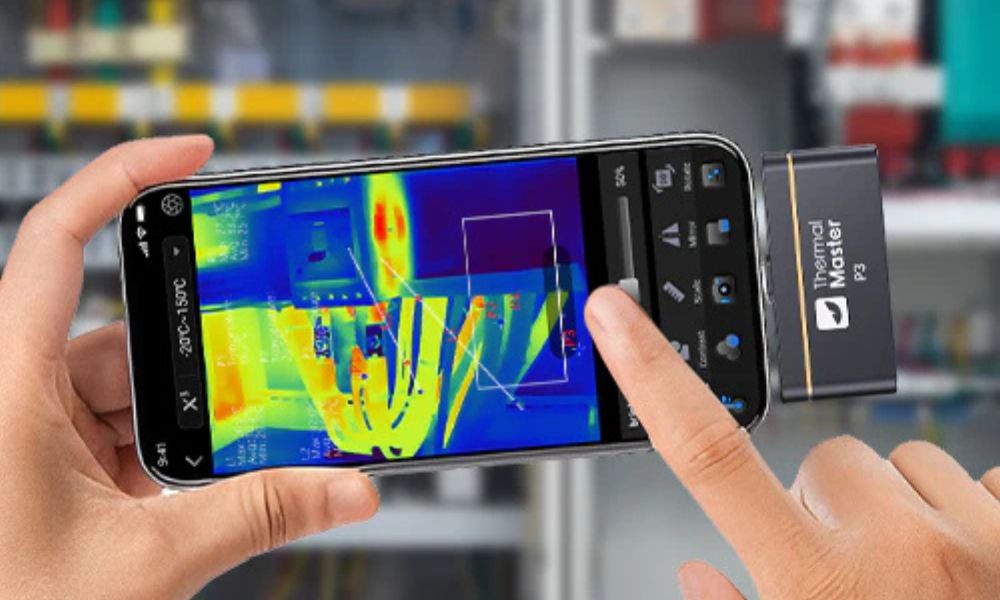
What’s the Best Thermal Camera for Moisture Detection?
Choosing the right thermal imager for humidity detection depends on your specific needs. The following Thermal Master models are particularly well-suited for leak detection.
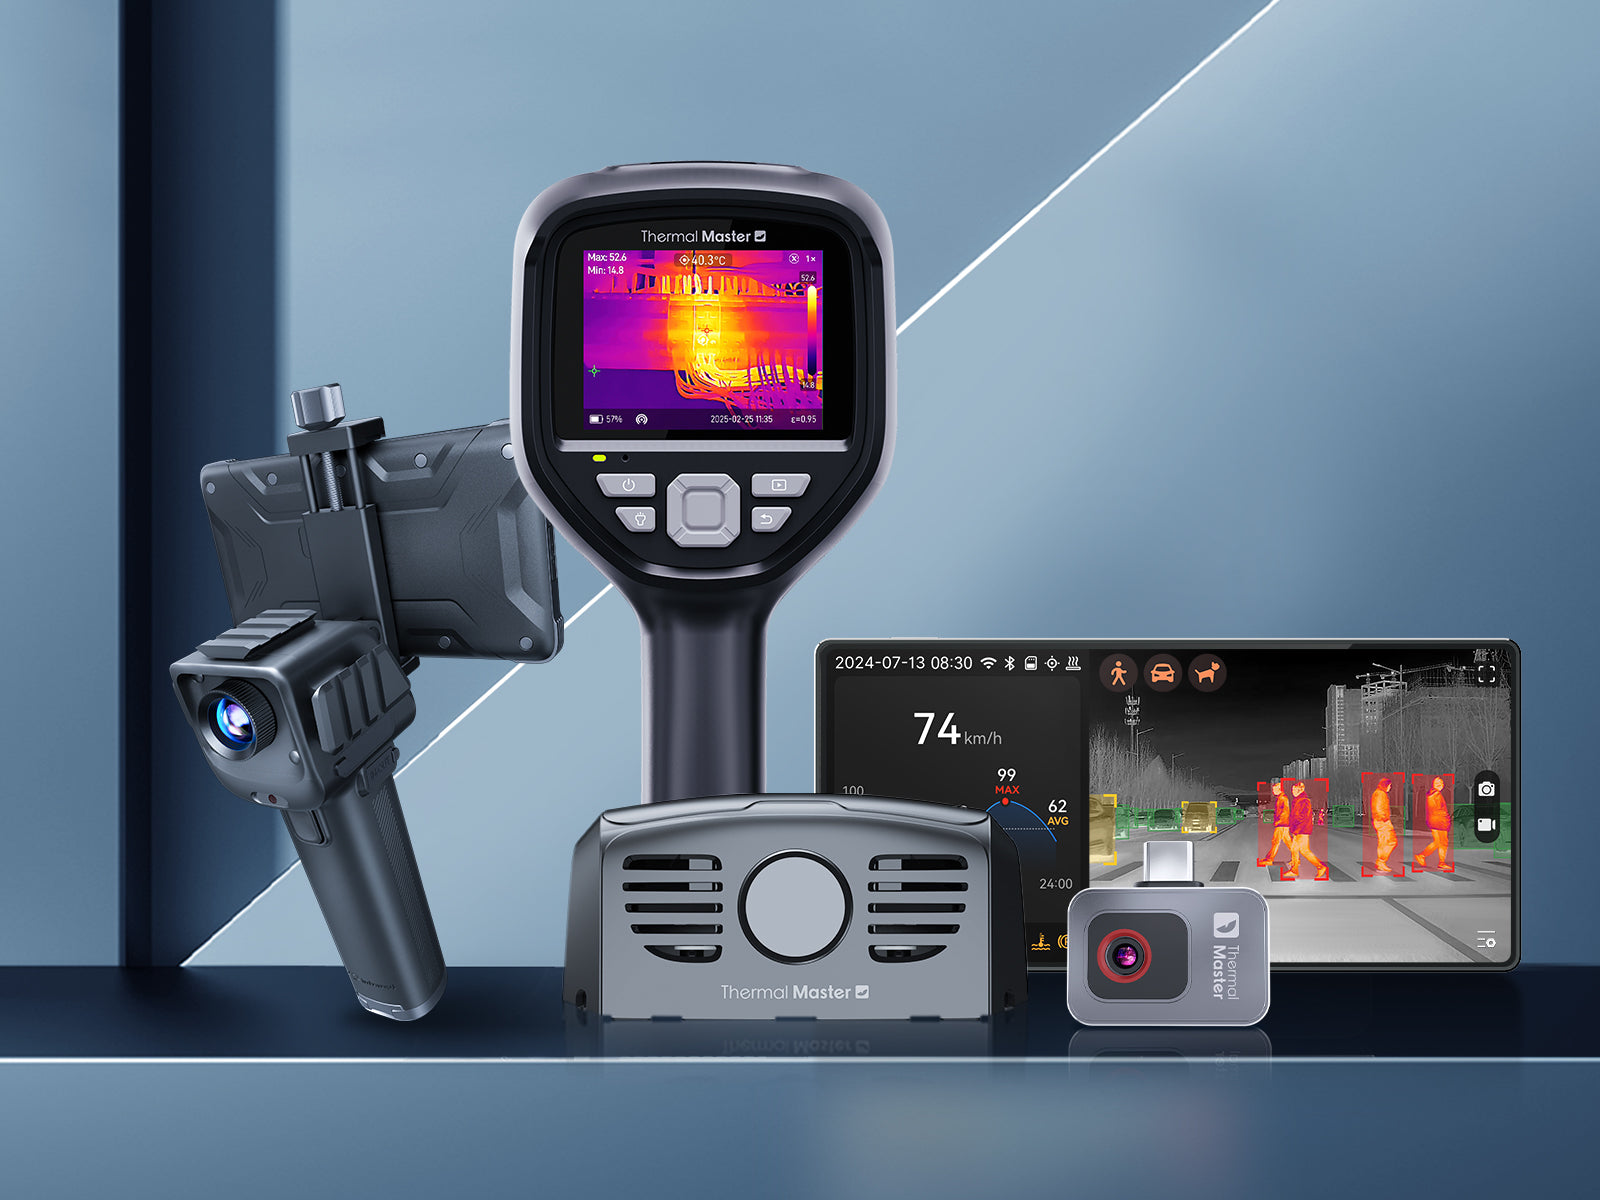
Thermal Master P2 Pro
The P2 Pro is a practical thermal imager for home inspections or DIY testing, easily locating moisture and leaks. As a smartphone thermal imager, it easily identifies temperature changes caused by moisture hidden behind walls, ceilings, or floors.
Thermal Master P2
The P2 is an economical thermal imager, ideal for pairing with an Android phone to detect moisture problems. It can also be used for routine inspections and small leak detection, helping to identify thermal anomalies associated with hidden moisture.
Thermal Master Thor002
The Thor002 is better suited for professional or frequent large-area inspections, revealing moisture distribution patterns in walls, roofs, and HVAC systems. If you need to conduct long-term inspections and value consistency and ease of use, the Thor002 is a good choice.

Which Thermal Camera Is Right for You?
If you're looking for quick home checks and basic humidity monitoring, the P1 smartphone thermal camera is convenient and easy to use. For larger areas or more frequent checks, the Thor handheld thermal camera offers a more comfortable user experience and clearer thermal imaging details.
Final Thoughts
Thermal imaging cameras provide a quick, non-destructive way to locate unseen leaks by displaying temperature changes caused by moisture. It rapidly narrows down the problem area without the need for guesswork or destructive methods. For homeowners and professionals alike, thermal imaging is a reliable leak detection tool.
FAQs
How do HVAC techs check for leaks?
HVAC technicians can first use a thermal imaging camera to check for leaks, scanning pipes, coils, and connections to look for abnormal temperature patterns caused by air leaks, refrigerant problems, or humidity. After narrowing down the suspected leak area, tools such as electronic leak detectors, pressure testers, or hygrometers can be used to confirm the source of the leak. This allows for accurate identification of the leak point while avoiding unnecessary disassembly.
How do plumbers find hidden leaks?
Before removing walls or floors, plumbers use non-invasive tools to narrow down the area of the leak, thus locating the hidden source. Thermal imaging helps them detect temperature changes caused by moisture, while listening devices, pressure tests, or hygrometers confirm the exact location of the leak. This step-by-step approach allows plumbers to accurately pinpoint the leak and minimize unnecessary damage.
How to find air leaks with a thermal camera?
By scanning walls, windows, doors, and pipes with a thermal imager, abnormal temperature patterns can be detected, revealing air leaks. When warm or cold air escapes, it creates clearly visible hot and cold stripes on the thermal image. By slowly scanning these areas, the thermal imager can pinpoint air leaks precisely without invasive procedures.
Related Reading:

Leave a comment
All comments are moderated before being published.
This site is protected by hCaptcha and the hCaptcha Privacy Policy and Terms of Service apply.