


Using a thermal imager for the first time may seem complicated, but once you master the basics, it becomes a powerful tool for thermal inspection. Whether you’re checking for water leaks, inspecting electrical systems, or identifying heat loss, a thermal imager can help you pinpoint issues.
Below, learn how to use a thermal imaging camera and discover practical tips and key considerations to help you achieve accurate and reliable results.
What Can You Do with a Thermal Imaging Camera?
Thermal imaging cameras allow you to visualize temperature differences more clearly, making them extremely useful in many practical applications. Here’s what they can do for you:
- Detect Heat Loss in Buildings: Identify insulation gaps, air leaks, and areas where energy is being wasted.
- Locate Water Leaks and Moisture Issues: Detect temperature changes caused by water leaks hidden behind walls, ceilings, or floors.
- Inspecting Electrical Systems: Locate overheated wires, loose connections, and overloaded circuits before failures occur.
- Assessing HVAC System Performance: Analyze airflow, duct leaks, and heating or cooling efficiency.
- Diagnosing Automotive Issues: Detect low battery power, overheated components, or abnormal heat distribution in vehicles.
- Inspect Solar Panels: Quickly identify faulty cells, hotspots, or underperforming panels.
- Monitor Industrial Equipment: Prevent failures by detecting overheating in motors, bearings, or mechanical components.
- Assist with Home Inspections: Identify hidden issues, including areas at risk of mold, structural gaps, and thermal bridges.
- Enhance Nighttime Visibility (Thermal Imaging Night Vision): Detect people, animals, or obstacles in dark or foggy conditions.
- Inspect Electronic Components (PCB Inspection): Identify abnormal heat in small components and circuit boards.
Step-by-Step Guide to Using a Thermal Imaging Camera
Step 1: Choose the Right Device for the Task
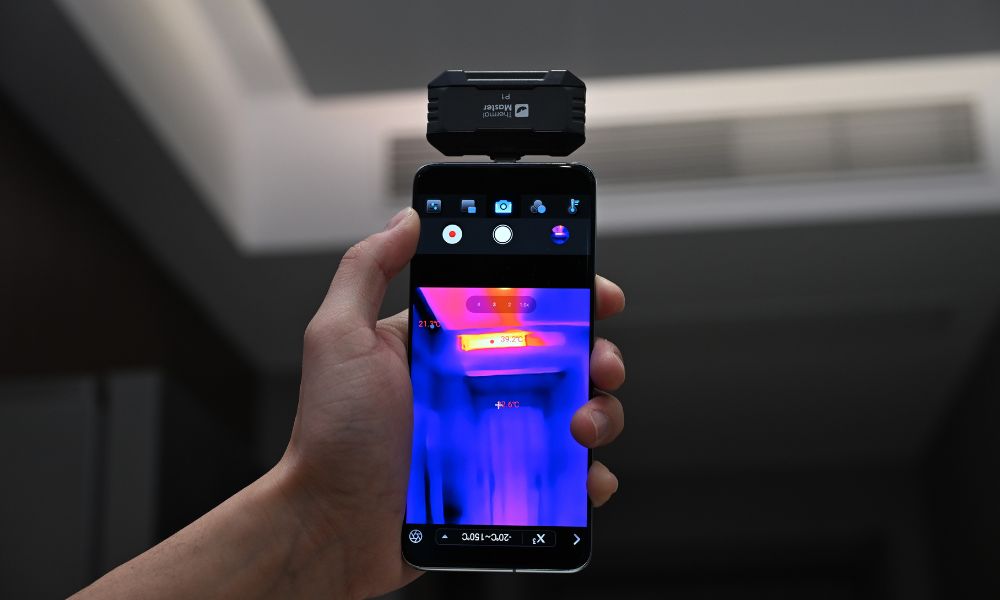
Before you begin, determine the type of thermal imager you’ll be using. Smartphone thermal imagers are better suited for quick inspections, portability, and app-based analysis. Handheld thermal imagers, on the other hand, are better suited for standalone operation, large-area scanning, and more demanding inspection tasks.
Step 2: Turn on the Device and Perform Calibration
First, turn on the thermal imager and wait for calibration to complete. For smartphone thermal imagers, such as “Thermal Camera for Android” and “Thermal Camera for iPhone,” connect the device to your phone and open the app before starting calibration. Handheld thermal imagers, on the other hand, are calibrated directly on the device, which is quicker and more convenient for on-site use.

Step 3: Adjust Basic Settings
Before scanning, configure settings such as temperature range, emissivity, and color mode. On smartphone thermal imaging cameras, these adjustments and settings can be made through the mobile app, which provides an intuitive and user-friendly interface. On handheld thermal imaging cameras, settings are adjusted via the built-in display, offering more direct control during professional inspections.
Step 4: Position the Camera Correctly
Aim the camera at the target area, taking care to maintain a consistent distance during the scan. Smartphone thermal imaging cameras are lighter and easier to maneuver in tight spaces, making them ideal for home inspections, electronic device checks, or vehicle inspections. Handheld thermal imaging cameras, on the other hand, offer a more stable grip and are better suited for scanning walls, equipment, roofs, or larger areas.
Step 5: Scan Slowly and Look for Temperature Anomalies
Slowly move the camera over the inspection area, focusing on any abnormal hot spots or cold spots. With a smartphone thermal camera, you can easily zoom in on targets and view the images immediately within the app. Handheld thermal imaging cameras, on the other hand, feature larger screens and a more stable field of view, allowing you to scan broader thermal distributions.
Step 6: Capture Thermal Images and Document Findings
If you detect abnormal temperature distributions, save the images or videos for later analysis. Smartphone thermal cameras are generally more convenient for this purpose, as files are stored directly on the device and can be shared quickly. However, handheld thermal cameras are more suitable when you need to capture images specifically for extended inspections or to create professional reports.
Step 7: Carefully Interpret the Results
Once the scan is complete, compare the thermal images to identify areas that may require further inspection. Smartphone thermal imaging cameras are particularly useful for quick visual checks and routine troubleshooting via their apps. However, for professional maintenance, building inspections, or industrial applications, handheld thermal imaging cameras are better suited for more detailed analysis.
Step 8: Confirm the Issue Through Additional Inspections
A thermal imager can help you identify abnormal temperature distributions, but it cannot pinpoint the exact cause. Whether you’re using a smartphone thermal imager or a handheld thermal imager, it’s recommended to use other tools to confirm the issue—such as water leaks, electrical faults, or mechanical problems—when you’re unsure.
What Should You Pay Attention to When Using a Thermal Camera?
To obtain accurate results from a thermal camera, it is important to first understand the various factors that can affect temperature readings. Here are the key points to keep in mind:
- Emissivity Settings: Different materials have distinct thermal radiation characteristics. Incorrect emissivity settings can lead to inaccurate temperature readings, such as when measuring metal, glass, or shiny surfaces.
- Reflective Surfaces: Thermal imagers cannot penetrate reflective materials. Instead, they may capture heat reflected from surrounding objects, resulting in inaccurate readings.
- Temperature Difference (ΔT): Thermal imaging works best when there is a significant temperature difference between objects. For example, when there is a difference between indoor and outdoor temperatures, insulation inspections or leak detection become more evident.
- Distance from the Target: Excessive distance reduces accuracy and detail. It is recommended to stay within the recommended measurement range.
- Environmental Conditions: Wind, rain, sunlight, or humidity can affect surface temperature and cause distorted readings, especially during outdoor inspections.
- Calibration and Stability: It is best to calibrate the thermal imager before use. Sudden temperature changes can affect sensor stability and image accuracy.
- Measurement Angle: Viewing objects from extreme angles may reduce accuracy. Therefore, it is best to scan the surface from a direct (perpendicular) angle.
- Do Not Rely Solely on Thermal Imaging: A thermal imager displays temperature differences, not the exact cause of the problem. Therefore, it is best to use other tools to confirm the inspection results.
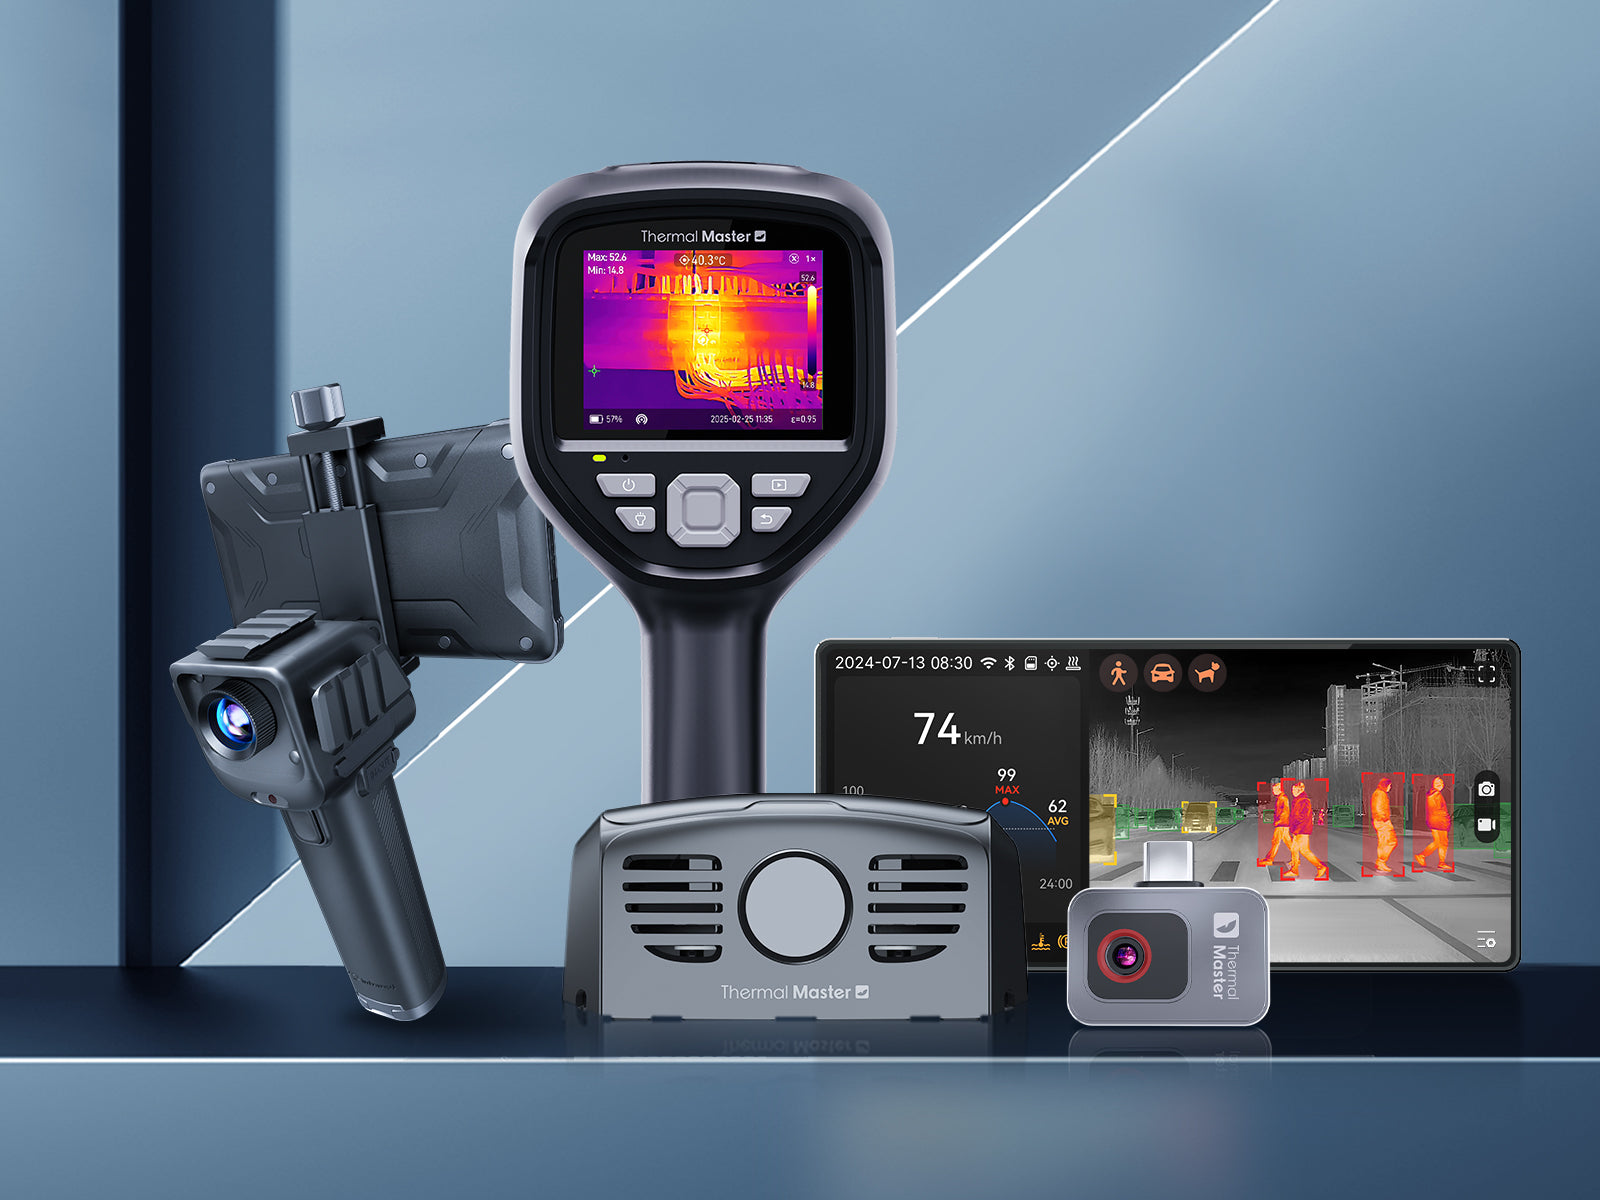
What Types of Thermal Imaging Cameras Are There?
Thermal imagers can be categorized into various types based on their intended uses and performance characteristics. The following are the main categories:
1. Smartphone Thermal Cameras
A smartphone thermal camera is a compact device that connects directly to a smartphone. Lightweight and portable, it is suitable for quick inspections such as home maintenance, vehicle inspections, and DIY projects. However, it relies on a mobile app for analysis.
2. Handheld Thermal Imagers
Handheld thermal camera features built-in screens and batteries, offering more stable performance and making them better suited for professional tasks such as building inspections, electrical diagnostics, and industrial maintenance.

3. Thermal Night Vision Devices (Vehicle-Mounted)
Night vision thermal camera devices are designed for driving and outdoor visibility, helping to detect pedestrians, animals, or obstacles in low-light or foggy conditions. They are easy to use; simply mount them on a vehicle to enhance nighttime driving safety.
4. Industrial Thermal Imaging Cameras
These high-performance industrial thermal imaging cameras are designed for use in harsh environments. They offer higher precision, greater sensitivity, and advanced analytical capabilities for monitoring machinery, electrical systems, and production processes.
5. Fixed/Mounted Thermal Imaging Cameras
These cameras are installed in fixed positions to enable continuous monitoring. They are commonly used in security systems, factories, or building management to track temperature changes over time.
How Does a Thermal Imaging Camera Work?
Thermal imagers work by detecting infrared radiation (heat) emitted by objects and converting it into a visible image. Areas with higher temperatures appear brighter or are displayed in different colors compared to cooler areas. They also highlight thermal distribution patterns, helping you identify issues such as hot spots, heat loss, or abnormal temperature changes.
Summary
Once you understand the key steps and the factors that affect measurement accuracy, using a thermal imager becomes very straightforward. By learning how to operate the device correctly and interpret temperature variations, you can quickly identify issues such as heat loss, leaks, or electrical faults. A thermal imager can become a reliable tool for both routine inspections and more specialized applications.
FAQ
Can I use my smartphone as a thermal camera?
Yes, you can turn your smartphone into a thermal imager by connecting a compatible thermal imaging device. This compact thermal imaging accessory transforms your phone into a portable inspection tool, helping you detect thermal anomalies and perform tasks such as home inspections, electrical troubleshooting, or automotive diagnostics.
Can you see bed bugs with a thermal camera?
No. Thermal imaging cameras cannot directly detect bed bugs; they are too small, and their body heat signals are not strong enough to be detected. However, you can identify areas with slightly higher temperatures where large numbers of bed bugs might be hiding, such as inside mattresses or in cracks in the walls. In most cases, thermal imaging cameras are best used as a supplementary tool for inspections, not as a replacement for visual inspections.
How to Use a Thermal Camera on Android?
To use a thermal camera on an Android device, connect a compatible thermal imaging device to your phone (for example, via a USB-C port), then open the corresponding app. Once the device is calibrated, adjust basic settings such as emissivity and temperature range, then point the camera at the target area and scan slowly. You can view the thermal image in real time, capture photos or videos, and use the tools within the app to analyze temperature variations.
How to use a thermal imaging camera to detect water leaks?
When using a thermal imaging camera to detect leaks, slowly scan the walls, ceilings, or floors and look for unusual temperature variations. Areas affected by moisture will be cooler or warmer than the surrounding areas, caused by moisture evaporation or accumulation. Pay close attention to irregular temperature patterns and compare them with temperature anomalies in adjacent areas. Of course, to ensure accurate results, it is best to document any temperature differences or conduct further inspections to confirm the issue.

コメントを書く
全てのコメントは、掲載前にモデレートされます
このサイトはhCaptchaによって保護されており、hCaptchaプライバシーポリシーおよび利用規約が適用されます。